Adobe Aero Tutorial: AR Elixir
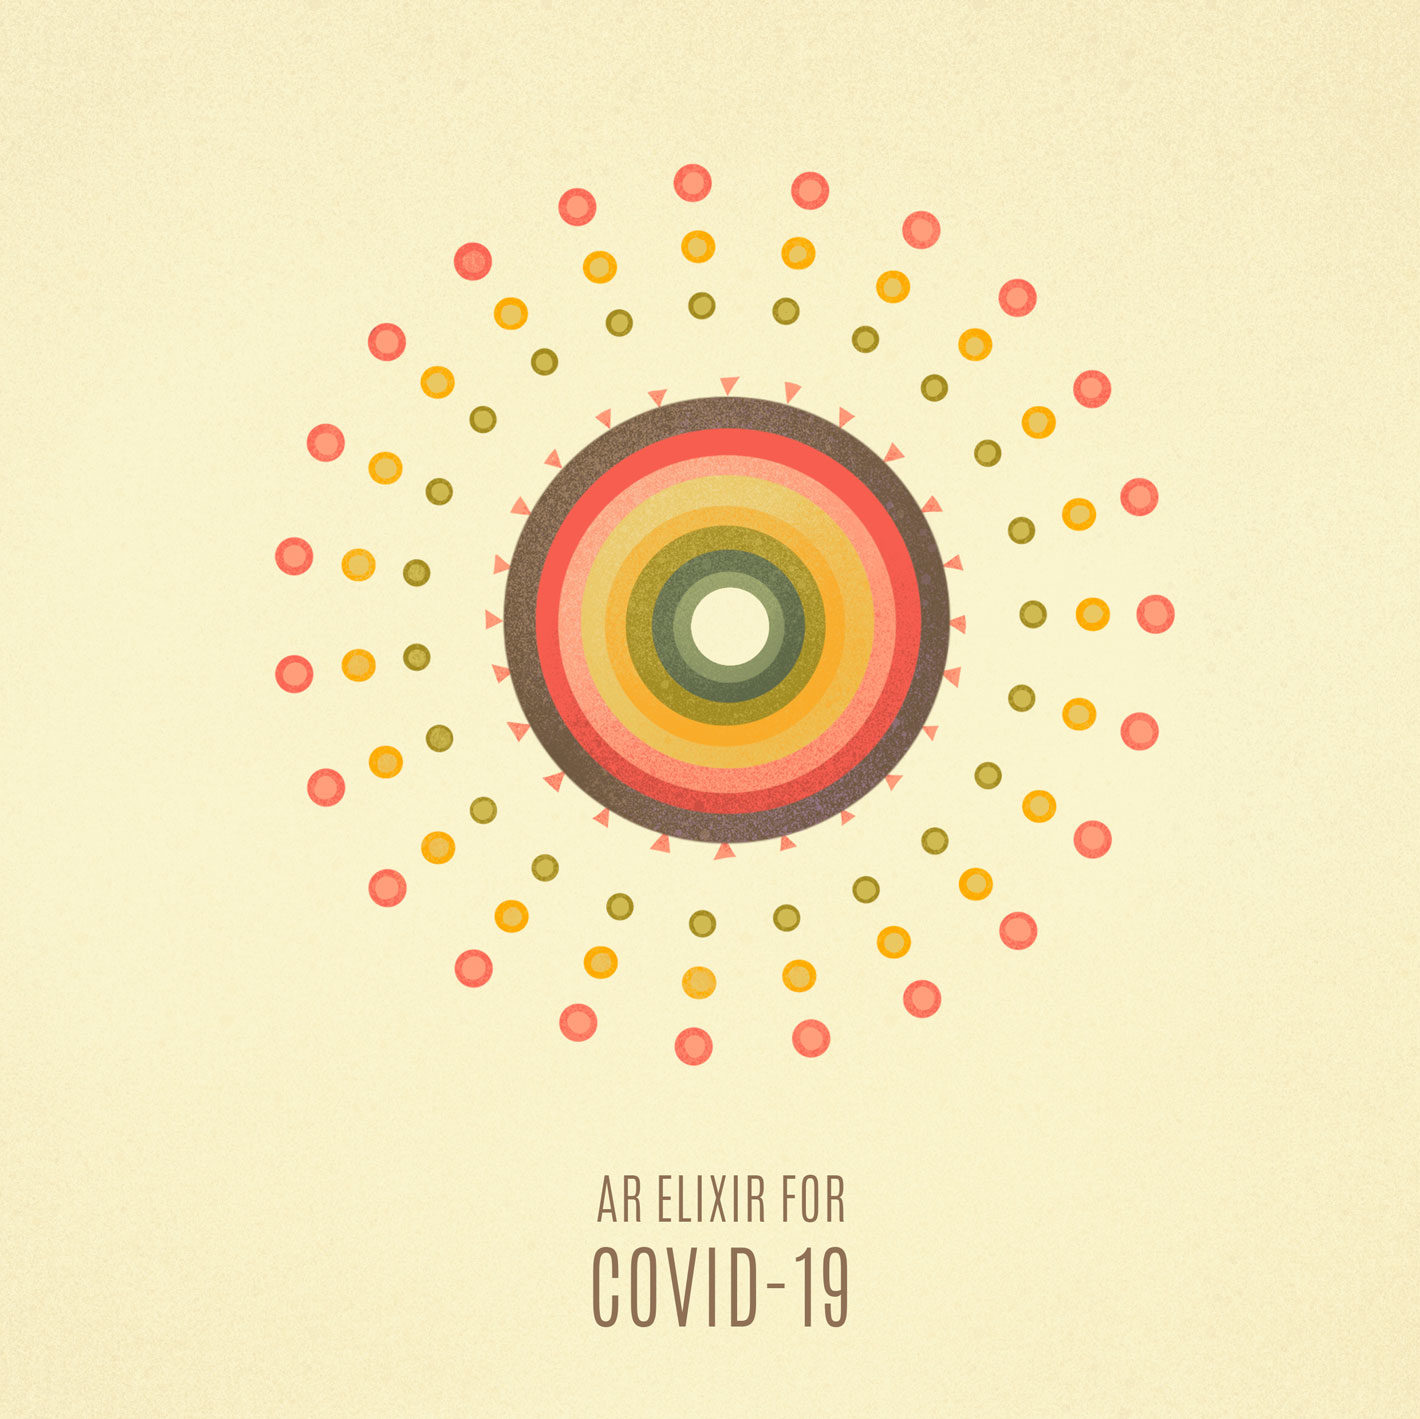
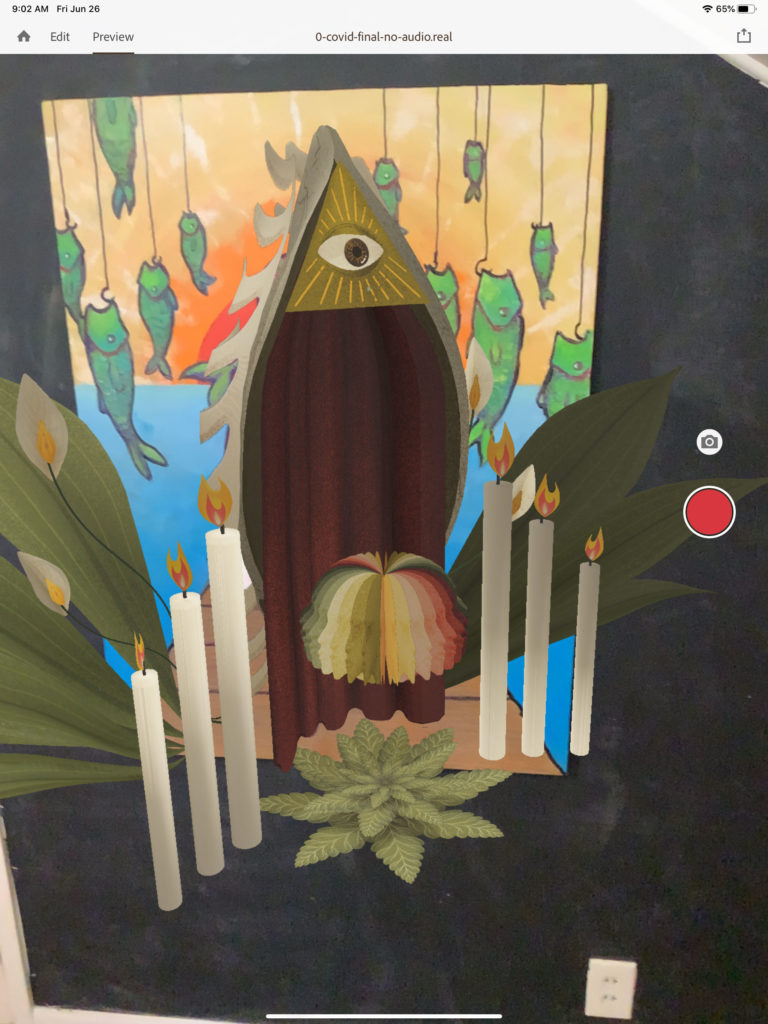
My showcase project for the Adobe AR Residency was about COVID-19. It’s three part interactive “anywhere altar” that uses a combination of timers, proximity triggers and tap triggers. This tutorial will explain how I created it in Adobe Aero.

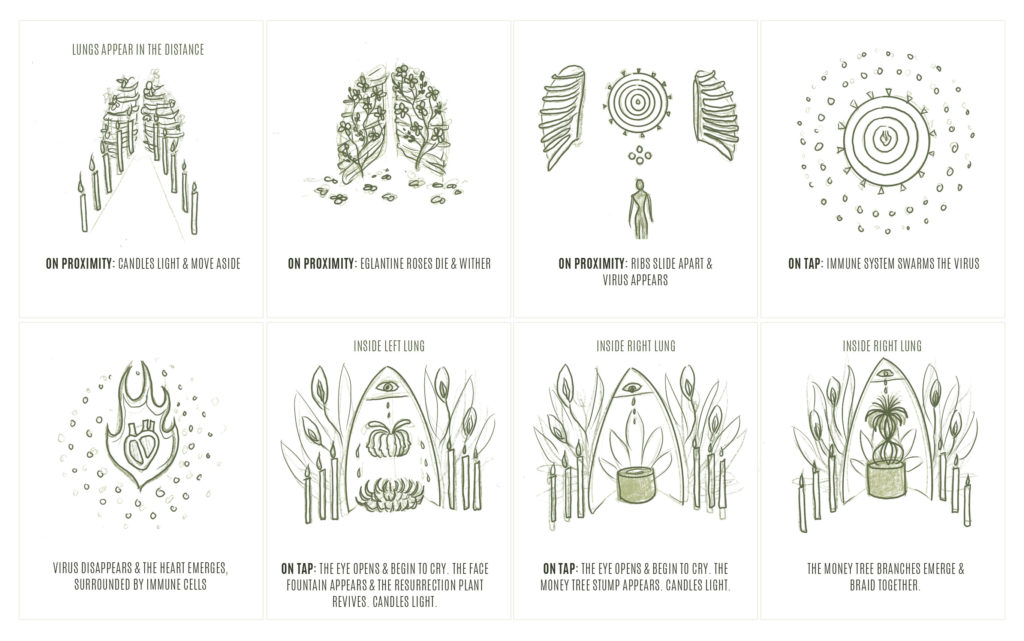
My workflow always starts with sketching and storyboards. During the planning stage, I map out the overall narrative flow, interaction design, and sound design.

Once I’m happy with the planning documents, I move on to visual design. As an illustrator, I find it’s helpful to start with 2D artwork first. I typically “discover” a piece by drawing it. This helps me refine my initial ideas and gives me a starting point to start thinking spatially.


Once, I’m happy with the illustrations, I create 3d versions in Blender. Once I have the 3d models built, I apply a material, mark the seams, then unwrap the object. I then take a screenshot of the unwrapped object, bring it into Procreate (on my iPad) and hand draw my textures. I’m rather new to 3d modeling, so I’m not sure if this is a typical workflow, but it works well for me.

Once the 3D assets are built, it’s time to create the augmented reality experience. I start by exporting each object as a GLB file. Some of the elements contain animations I created in Blender. Others are animated in Adobe Aero.

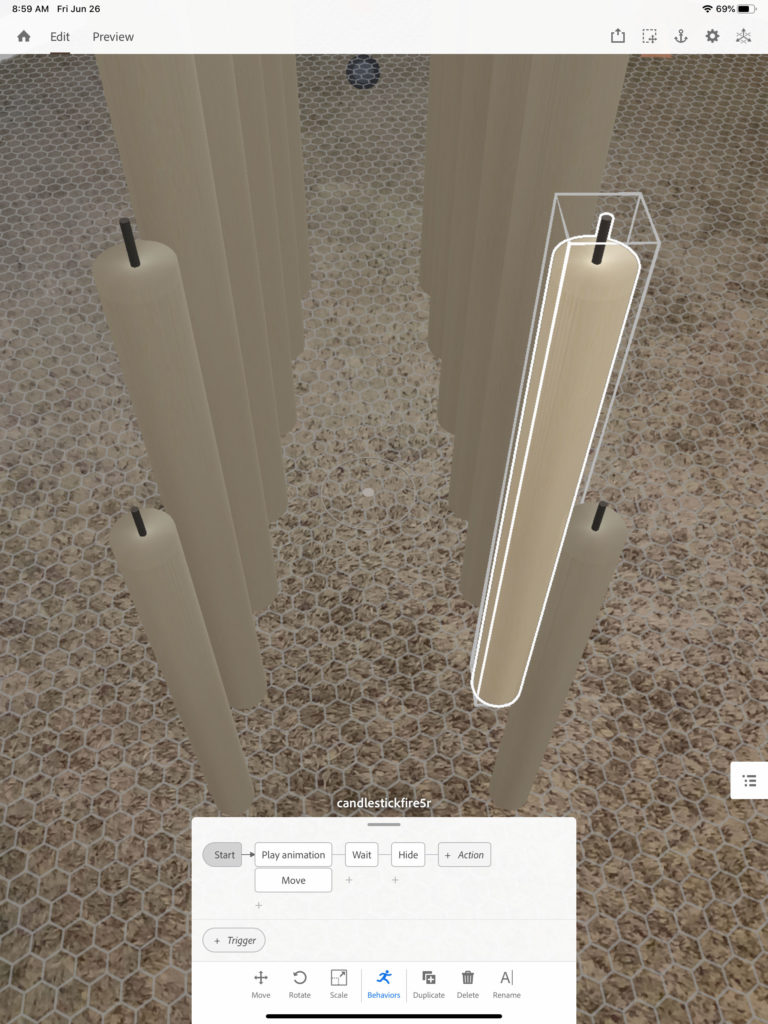
- I created a candle (with flame animation in Blender), then exported it as a GLB file.
- I imported that file into Adobe Aero, then added a series of behaviors:
- I added a START trigger.
- I attached a PLAY ANIMATION action and designated the embedded flame animation.
- I then attached a MOVE action to candle slightly to the side.
- Then, I added a HIDE function to clear the stage.
- From there, I duplicated the candle changing the scale, spacing and TIME trigger. I added a few milliseconds to each candle’s START behavior, so they light and move in a cascading fashion.

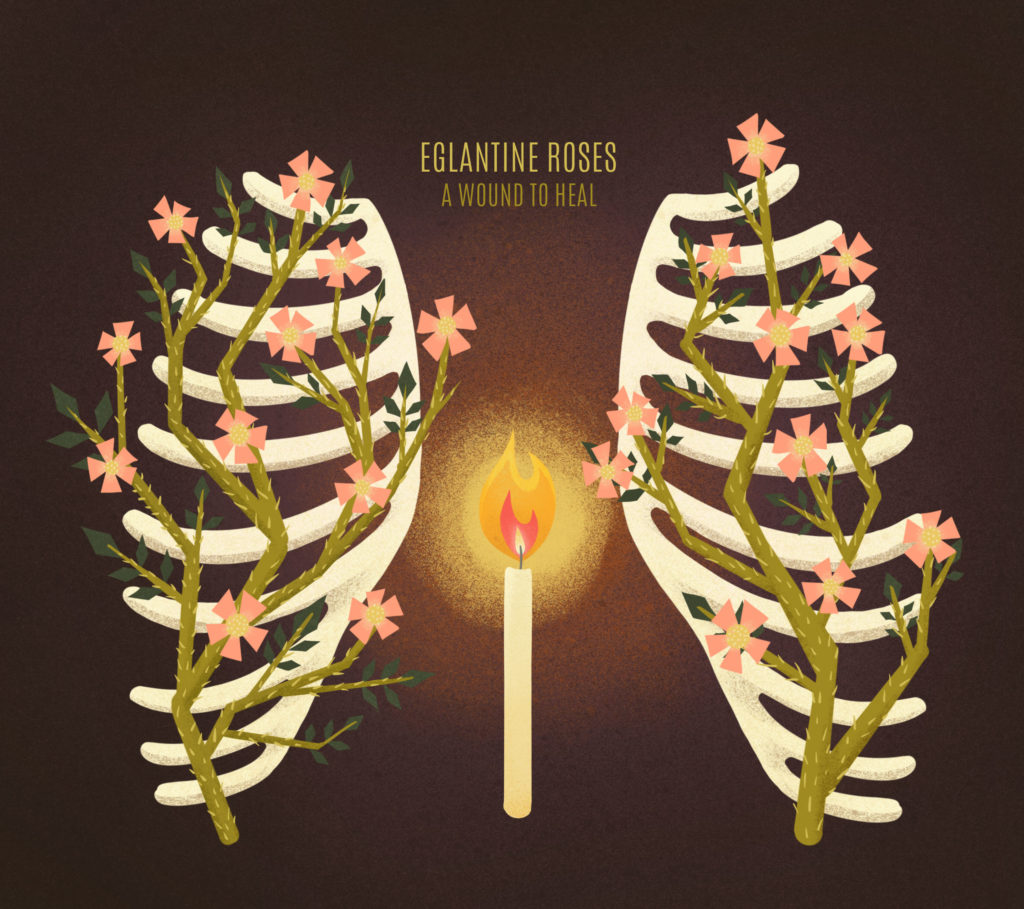
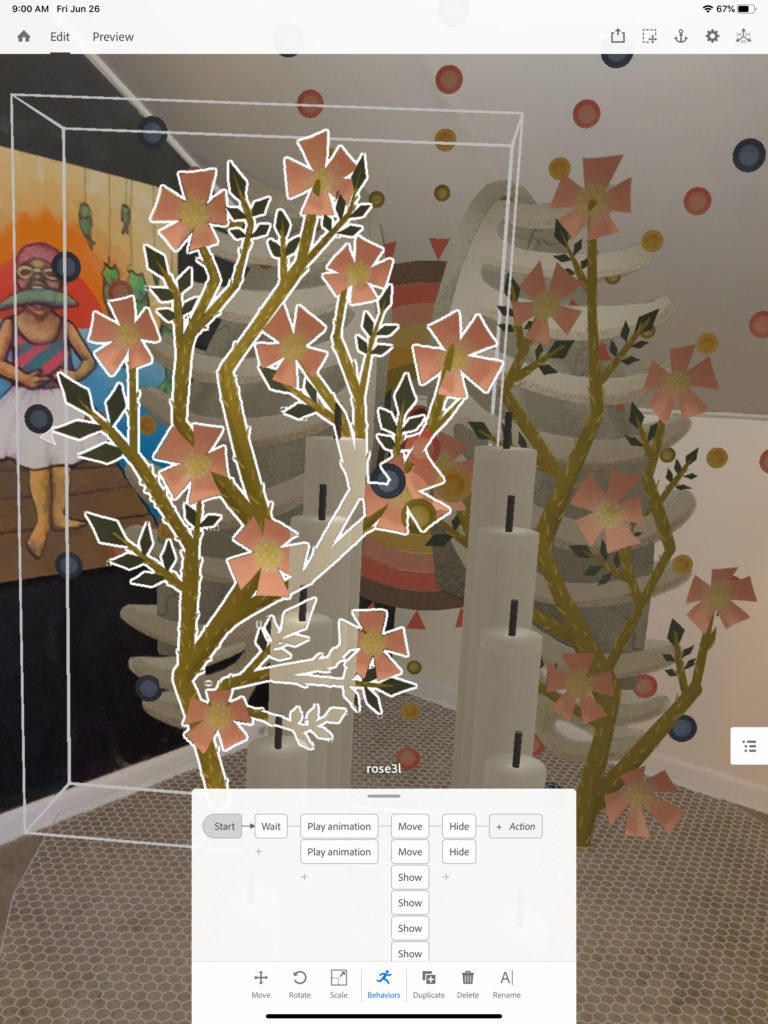
- Each of the rose bushes in a separate GLB file with an embedded animation.
- I wanted the roses to wilt after the candles were done lighting and moving, so I added a START trigger and attached a WAIT action.
- After the WAIT action, I called the rose’s wilt animations by using a PLAY ANIMATION action.
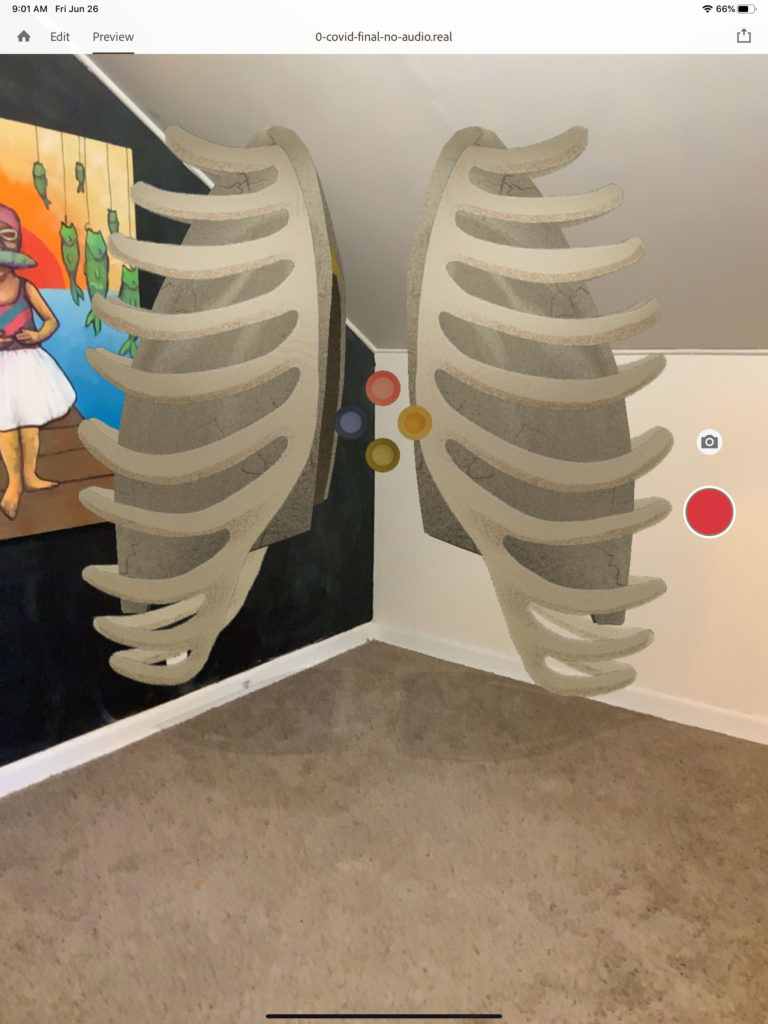
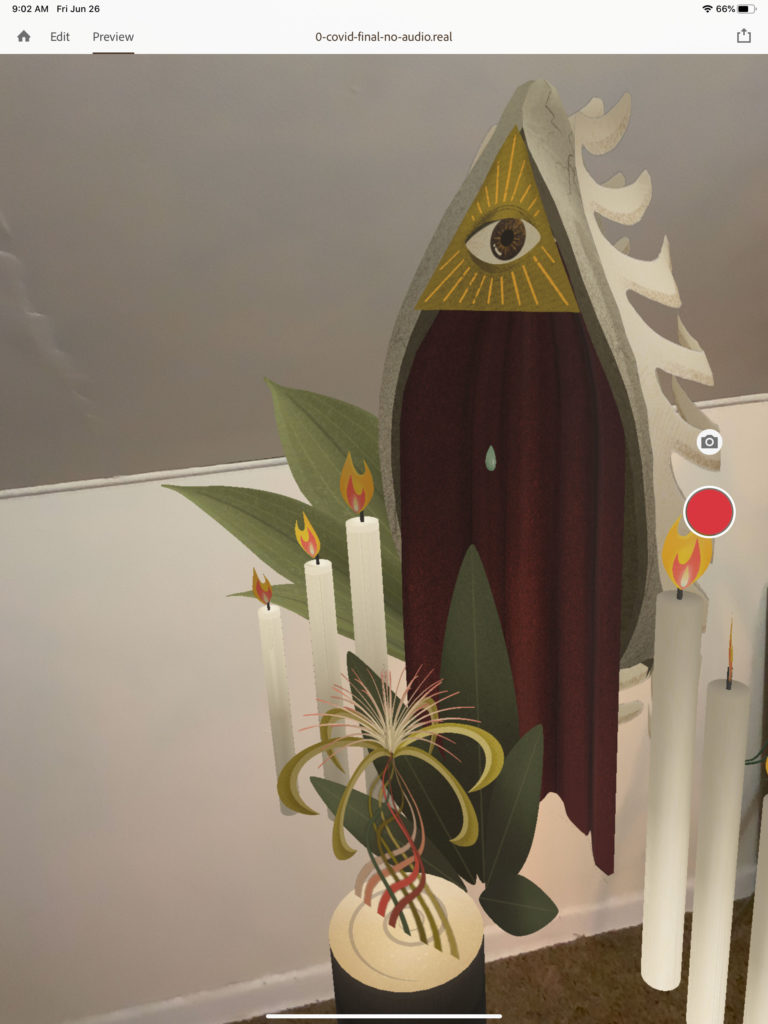
- Once the roses have finished their animation, I added a MOVE action for both of the lungs, so they move side to side, exposing the center area.
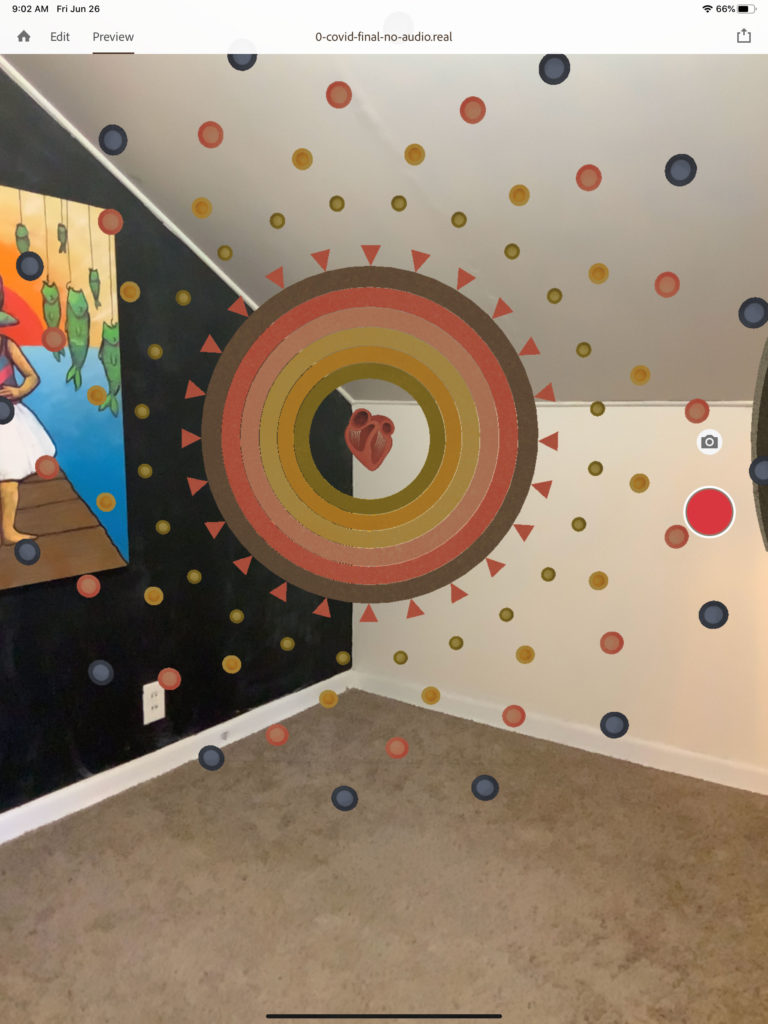
- After they move out of the way, I called a series of cascading SHOW actions on each of the virus’ concentric circles. I staggered their entrance by incrementing the DELAY option in the SHOW action.
- Then, I added a HIDE action to hide the final remnants of the roses. Stage tidiness is key!


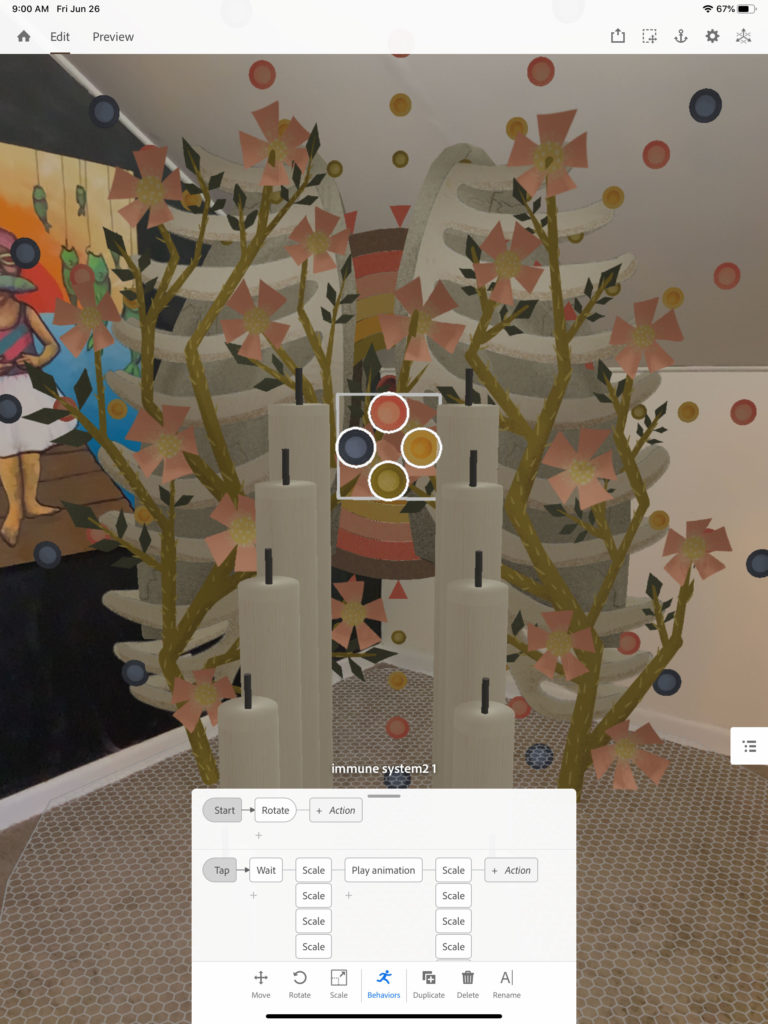
- First, I added a START trigger to the immune cells.
- Then, I attached a ROTATE action (infinite). This creates the slow spin.
- Then, I added a TAP trigger.
- I attached a WAIT action so that the proceeding actions happen at the appropriate time. TIP: Action chains move in rows – left to right (over time.) Actions that appear in the same column launch at the same time.
- After the WAIT, I used SCALE, to make the heart appear.
- After the heart appears, I called it’s embedded heartbeat animation by attaching a PLAY ANIMATION action.
- I then attached a series of SCALE actions to shrink the immune system rings down to 25% of their original size.
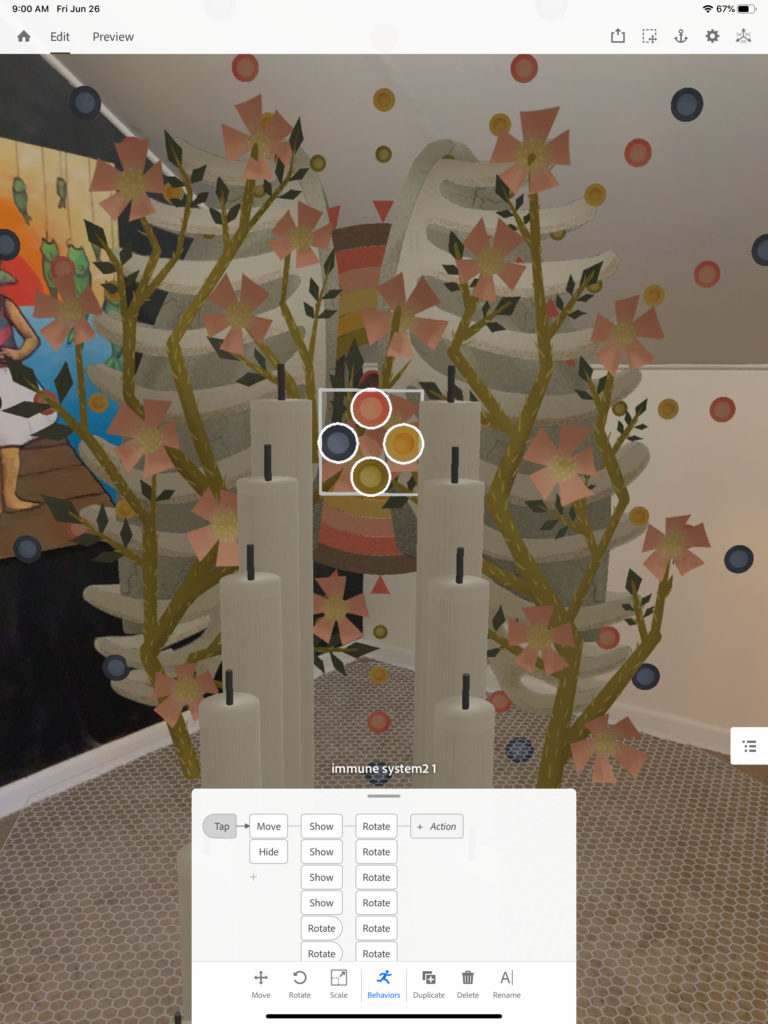
- I added another TAP trigger to the cells. TIP: It can be helpful to divide your actions into multiple trigger sets. (i.e. Create one TAP trigger for one set of object/actions and an additional one for a different set of objects/actions.) They will launch at the same time, unless directed otherwise. Not only does it keep things organized, but it also seems to function more consistently.
- Then, I created a MOVE action to shoot the immune system into the center of the virus followed by a HIDE function.
- From there, I added a series of cascading SHOW and ROTATE actions to the immune system rings. Each is called a few milliseconds after the next using the DELAY option. You’ll see that I use this technique all of the time.
- After they appear and start to spin, I added another round of ROTATE actions to all of the virus elements and the immune system rings.
- Once they have completed a few spins, I added a HIDE action for each, again using the incremental DELAY technique.

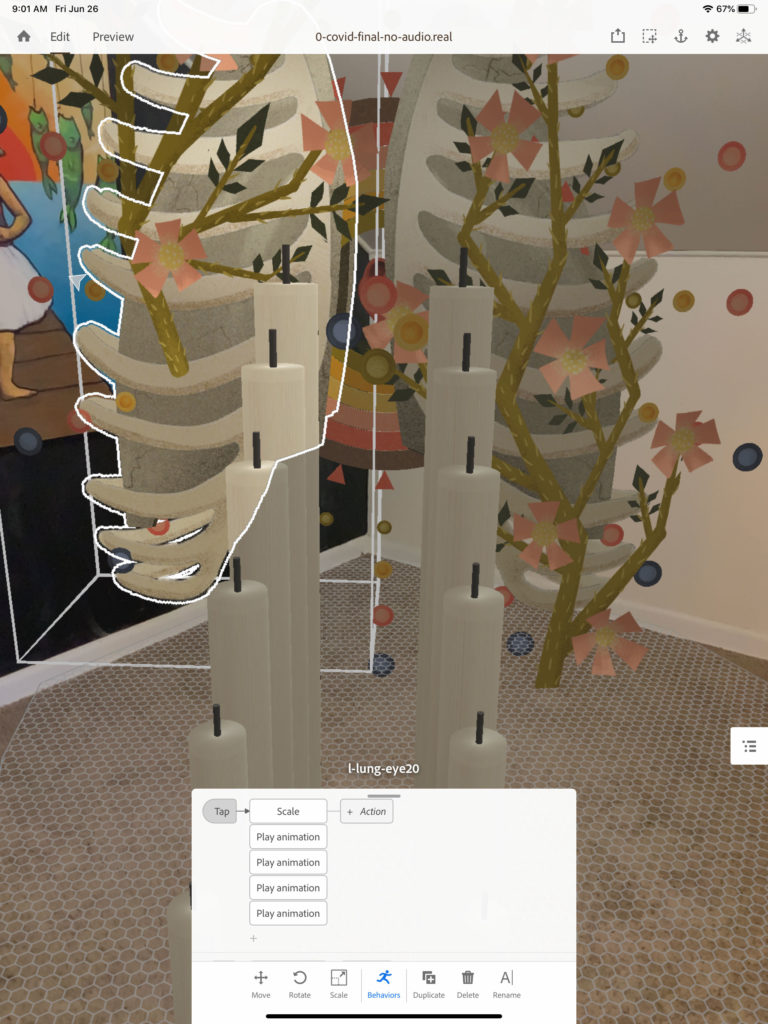
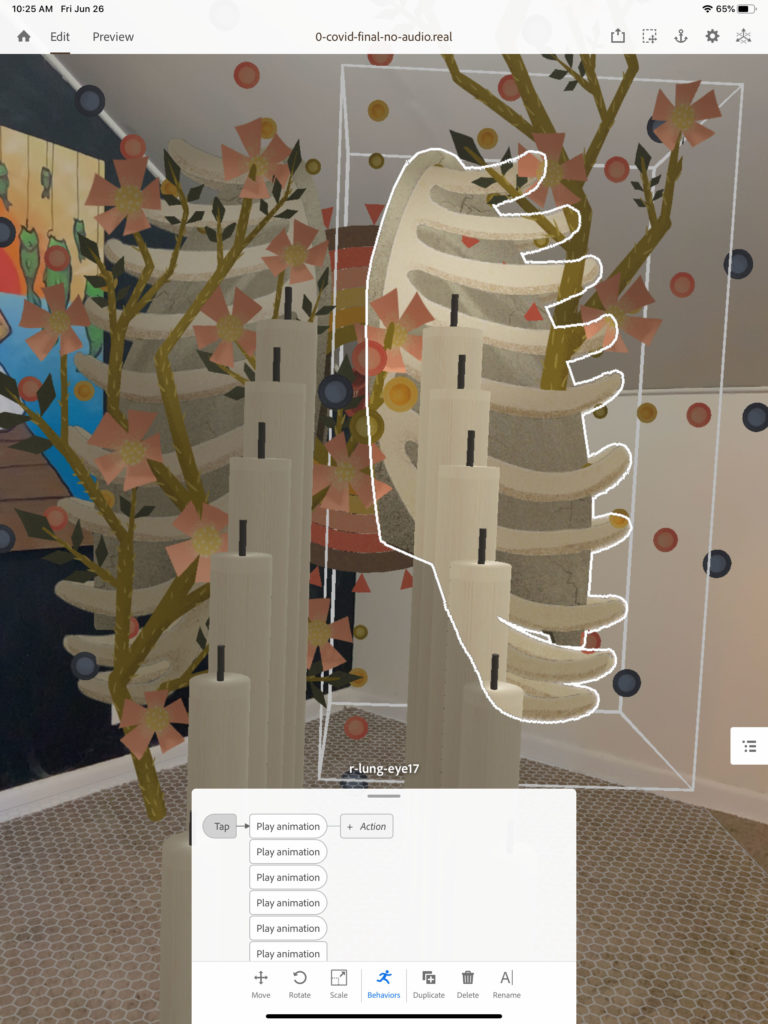
The next set of triggers and behaviors are attached to the left lung. The lung’s contents are divided into a few different GLBs with embedded animations: the lung itself (with eye and breathing animation), inside the lung (which contains the face fountain, the water, and the resurrection plant animations), the peace lilies, the peace lilies leaves (with grow animation), and the candles (with grow and flame animations built-in).
- I attached a TAP trigger to the left lung.
- I then attached a series of PLAY ANIMATION actions to call the embedded animations: eye blink (infinite), the tears (infinite), face fountain, the water, resurrection plant.
- I then attached a separate TAP trigger to the lung. Again, separating these action chains into separate triggers is a handy and effective way to work.
- For this trigger, I attached another set of PLAY ANIMATION actions to call the additional elements: the candles (their entrance and flame animations), the peace lilies, and the greenery that frames the whole scene.


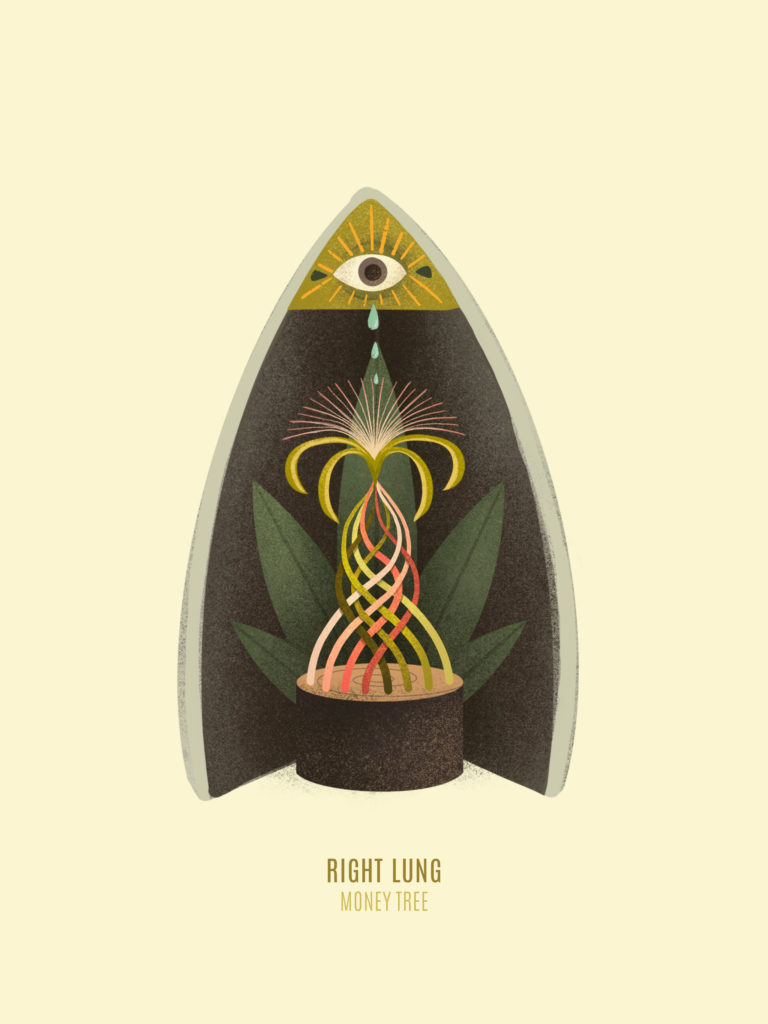
The next section outlines how I created the interactivity for the right lung. (You’ll notice I used a lot of the same techniques that I’ve used throughout.) The lung elements are divided into a few different GLBs. There is the main lung, which contains the eye and breathing animations, the money tree, the tears, the peace lilies, the candles, and the greenery.
- I attached a TAP animation to the lung.
- Then, I attached a series of PLAY ANIMATION actions to call the various objects/animations: breathing (infinite), eye blink (infinite), tears (infinite), money tree, peace lilies, the candles, and greenery.
That’s it. Thanks for reading all the way to the bottom. Hopefully, that will help some of the aspiring mixed reality artists out there. If you have questions, drop a comment below.